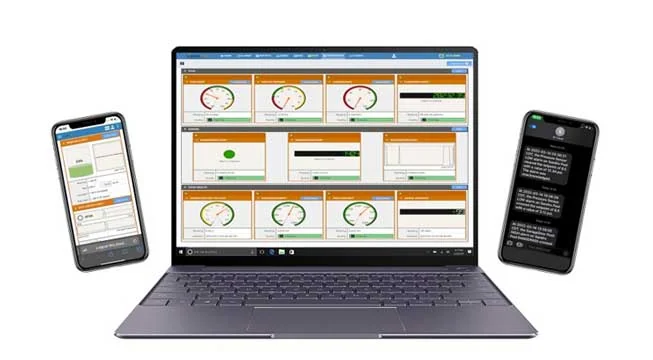
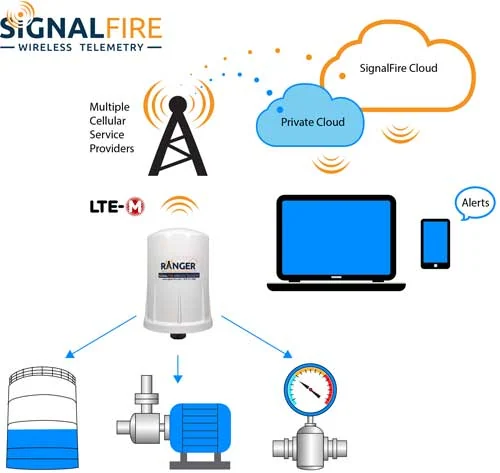
| Cloud and Multi Tenant Datasheet | Datasheet | Cloud, LTE-M1 Cellular, RANGER | pdf | | | datasheet | cloud lte-m1-cellular ranger | |
| Cloud API Manual | Manual | Cloud, DIN RANGER, LTE-M1 Cellular, Pressure RANGER, RANGER, RANGER Wall Mount, RANGER900 | pdf | | | manual | cloud din-ranger lte-m1-cellular pressure-ranger ranger ranger-wall-mount ranger900 | |
| Cloud Manual | Manual | Cloud, LTE-M1 Cellular, RANGER | www | | | manual | cloud lte-m1-cellular ranger | |
| Configure Seametrics Modbus with RANGER Modbus | Manual | 900 MHz, DIN RANGER, RANGER, RANGER Wall Mount | pdf | EN | | manual | 900-mhz din-ranger ranger ranger-wall-mount | en |
| Connecting to the SignalFire Cloud using Ignition | Tech Note | LTE-M1 Cellular, RANGER | pdf | | | tech-note | lte-m1-cellular ranger | |
| Fast Reporting RANGER | Tech Note | LTE-M1 Cellular, RANGER | pdf | | | tech-note | lte-m1-cellular ranger | |
| Murphy TTD to RANGER | Tech Note | LTE-M1 Cellular, RANGER | pdf | | | tech-note | lte-m1-cellular ranger | |
| Node Right Angle Bracket Dimensional Drawing | Accessories, Drawing | Node Checker, RANGER, Sentinel | pdf | | | accessories drawing | node-checker ranger sentinel | |
| RANGER – Ignition Integration Guide | Tech Note | LTE-M1 Cellular, RANGER | pdf | | | tech-note | lte-m1-cellular ranger | |
| RANGER Adds Automatic Reporting Interval Adjustments | Tech Note | RANGER | pdf | | | tech-note | ranger | |
| RANGER C1D2 Certificate | Certificate | LTE-M1 Cellular, RANGER | pdf | EN | | certificate | lte-m1-cellular ranger | en |
| RANGER CE Certificate | Certificate | LTE-M1 Cellular, RANGER | pdf | | | certificate | lte-m1-cellular ranger | |
| RANGER Connectivity Options | Datasheet | Cloud, DIN RANGER, Pressure RANGER, RANGER, RANGER Wall Mount, RANGER900 | pdf | | | datasheet | cloud din-ranger pressure-ranger ranger ranger-wall-mount ranger900 | |
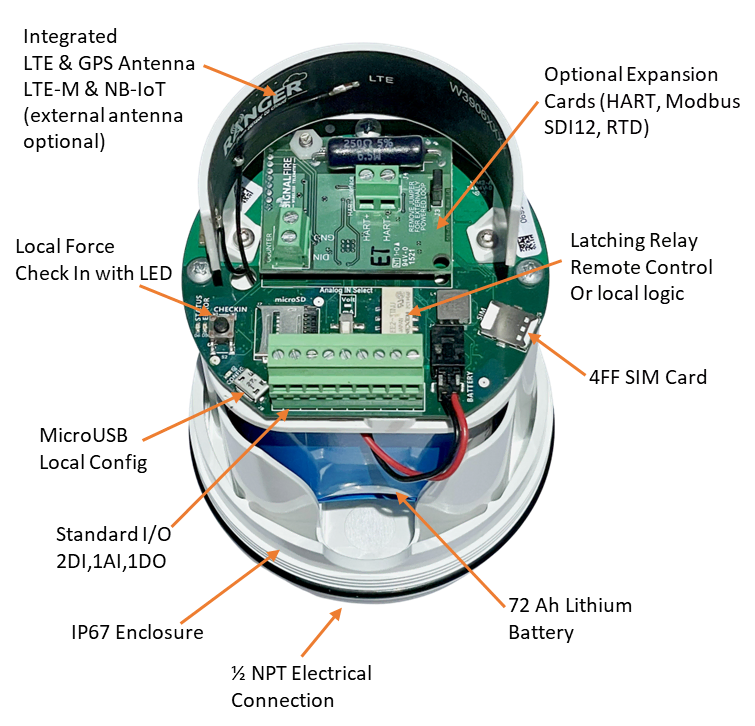
| RANGER Datasheet | Datasheet | LTE-M1 Cellular, RANGER | pdf | EN | | datasheet | lte-m1-cellular ranger | en |
| RANGER Drawing | Drawing | LTE-M1 Cellular, RANGER | pdf | | | drawing | lte-m1-cellular ranger | |
| RANGER Junction Box Drawing | Drawing | RANGER | pdf | | | drawing | ranger | |
| RANGER Junction Box Manual | Manual | LTE-M1 Cellular, RANGER | pdf | | | manual | lte-m1-cellular ranger | |
| RANGER Manual | Manual | LTE-M1 Cellular, RANGER | pdf | | | manual | lte-m1-cellular ranger | |
| RANGER MQTT Security | Tech Note | LTE-M1 Cellular, RANGER | pdf | | | tech-note | lte-m1-cellular ranger | |
| RANGER MQTT SparkPlug Implementation | Tech Note | LTE-M1 Cellular, RANGER | pdf | | | tech-note | lte-m1-cellular ranger | |
| RANGER Private Cloud OTA Firmware Update Process | Tech Note | LTE-M1 Cellular, RANGER | pdf | | | tech-note | lte-m1-cellular ranger | |
| RANGER Rescue Bootloader Mode | Tech Note | LTE-M1 Cellular, RANGER | pdf | | | tech-note | lte-m1-cellular ranger | |
| RANGER Tag Guide v0.1.20 | RANGER Tag Guide – Archive | LTE-M1 Cellular, RANGER | xlsx | | | ranger-tag-guide-archive | lte-m1-cellular ranger | |
| RANGER Tag Guide v0.1.20-HART | RANGER Tag Guide – Archive | LTE-M1 Cellular, RANGER | xlsx | | | ranger-tag-guide-archive | lte-m1-cellular ranger | |
| RANGER Tag Guide v0.1.20-Modbus | RANGER Tag Guide – Archive | LTE-M1 Cellular, RANGER | xlsx | | | ranger-tag-guide-archive | lte-m1-cellular ranger | |
| RANGER Tag Guide v0.1.20-SDI-12 | RANGER Tag Guide – Archive | LTE-M1 Cellular, RANGER | xlsx | | | ranger-tag-guide-archive | lte-m1-cellular ranger | |
| RANGER Tag Guide v0.1.22 | RANGER Tag Guide – Archive | LTE-M1 Cellular, RANGER | xlsx | | | ranger-tag-guide-archive | lte-m1-cellular ranger | |
| RANGER Tag Guide v0.1.22-HART | RANGER Tag Guide – Archive | LTE-M1 Cellular, RANGER | xlsx | | | ranger-tag-guide-archive | lte-m1-cellular ranger | |
| RANGER Tag Guide v0.1.22-Modbus | RANGER Tag Guide – Archive | LTE-M1 Cellular, RANGER | xlsx | | | ranger-tag-guide-archive | lte-m1-cellular ranger | |
| RANGER Tag Guide v0.1.22-SDI-12 | RANGER Tag Guide – Archive | LTE-M1 Cellular, RANGER | xlsx | | | ranger-tag-guide-archive | lte-m1-cellular ranger | |
| RANGER Tag Guide v0.1.23 | RANGER Tag Guide – Archive | LTE-M1 Cellular, RANGER | xlsx | | | ranger-tag-guide-archive | lte-m1-cellular ranger | |
| RANGER Tag Guide v0.1.23-HART | RANGER Tag Guide – Archive | LTE-M1 Cellular, RANGER | xlsx | | | ranger-tag-guide-archive | lte-m1-cellular ranger | |
| RANGER Tag Guide v0.1.23-Modbus | RANGER Tag Guide – Archive | LTE-M1 Cellular, RANGER | xlsx | | | ranger-tag-guide-archive | lte-m1-cellular ranger | |
| RANGER Tag Guide v0.1.23-SDI-12 | RANGER Tag Guide – Archive | LTE-M1 Cellular, RANGER | xlsx | | | ranger-tag-guide-archive | lte-m1-cellular ranger | |
| RANGER Tag Guide v0.1.24-Modbus | RANGER Tag Guide – Archive | LTE-M1 Cellular, RANGER | xlsx | | | ranger-tag-guide-archive | lte-m1-cellular ranger | |
| RANGER Tag Guide v0.1.25 | RANGER Tag Guide – Archive | LTE-M1 Cellular, RANGER | xlsx | | | ranger-tag-guide-archive | lte-m1-cellular ranger | |
| RANGER Tag Guide v0.1.25-HART | RANGER Tag Guide – Archive | LTE-M1 Cellular, RANGER | xlsx | | | ranger-tag-guide-archive | lte-m1-cellular ranger | |
| RANGER Tag Guide v0.1.25-Modbus | RANGER Tag Guide – Archive | LTE-M1 Cellular, RANGER | xlsx | | | ranger-tag-guide-archive | lte-m1-cellular ranger | |
| RANGER Tag Guide v0.1.25-SDI-12 | RANGER Tag Guide – Archive | LTE-M1 Cellular, RANGER | xlsx | | | ranger-tag-guide-archive | lte-m1-cellular ranger | |
| RANGER Tag Guide v0.1.31-DIN | RANGER Tag Guide – Archive | DIN RANGER, LTE-M1 Cellular, RANGER | xlsx | | | ranger-tag-guide-archive | din-ranger lte-m1-cellular ranger | |
| RANGER Tag Guide v0.1.31-HART | RANGER Tag Guide – Archive | LTE-M1 Cellular, RANGER | xlsx | | | ranger-tag-guide-archive | lte-m1-cellular ranger | |
| RANGER Tag Guide v0.1.31-Modbus | RANGER Tag Guide – Archive | LTE-M1 Cellular, RANGER | xlsx | | | ranger-tag-guide-archive | lte-m1-cellular ranger | |
| RANGER Tag Guide v0.1.31-SDI-12 | RANGER Tag Guide – Archive | LTE-M1 Cellular, RANGER | xlsx | | | ranger-tag-guide-archive | lte-m1-cellular ranger | |
| Ranger Tag Guide v0.1.32 | RANGER Tag Guide – Archive | LTE-M1 Cellular, RANGER | xlsx | | | ranger-tag-guide-archive | lte-m1-cellular ranger | |
| Ranger Tag Guide v0.1.32-DIN | RANGER Tag Guide – Archive | DIN RANGER, LTE-M1 Cellular, RANGER | xlsx | | | ranger-tag-guide-archive | din-ranger lte-m1-cellular ranger | |
| Ranger Tag Guide v0.1.32-HART | RANGER Tag Guide – Archive | LTE-M1 Cellular, RANGER | xlsx | | | ranger-tag-guide-archive | lte-m1-cellular ranger | |
| Ranger Tag Guide v0.1.32-Modbus | RANGER Tag Guide – Archive | LTE-M1 Cellular, RANGER | xlsx | | | ranger-tag-guide-archive | lte-m1-cellular ranger | |
| Ranger Tag Guide v0.1.32-SDI-12 | RANGER Tag Guide – Archive | LTE-M1 Cellular, RANGER | xlsx | | | ranger-tag-guide-archive | lte-m1-cellular ranger | |
| Ranger Tag Guide v0.1.33 | RANGER Tag Guide – Archive | LTE-M1 Cellular, RANGER | xlsx | EN | | ranger-tag-guide-archive | lte-m1-cellular ranger | en |
| Ranger Tag Guide v0.1.33-DIN | RANGER Tag Guide – Archive | DIN RANGER, LTE-M1 Cellular, RANGER | xlsx | EN | | ranger-tag-guide-archive | din-ranger lte-m1-cellular ranger | en |
| Ranger Tag Guide v0.1.33-HART | RANGER Tag Guide – Archive | LTE-M1 Cellular, RANGER | xlsx | EN | | ranger-tag-guide-archive | lte-m1-cellular ranger | en |
| Ranger Tag Guide v0.1.33-Modbus | RANGER Tag Guide – Archive | LTE-M1 Cellular, RANGER | xlsx | EN | | ranger-tag-guide-archive | lte-m1-cellular ranger | en |
| Ranger Tag Guide v0.1.33-SDI-12 | RANGER Tag Guide – Archive | LTE-M1 Cellular, RANGER | xlsx | EN | | ranger-tag-guide-archive | lte-m1-cellular ranger | en |
| RANGER Tag Guide v0.1.37 | RANGER Tag Guide – Archive | LTE-M1 Cellular, RANGER | xlsx | EN | | ranger-tag-guide-archive | lte-m1-cellular ranger | en |
| RANGER Tag Guide v0.1.37-DIN | RANGER Tag Guide – Archive | DIN RANGER, LTE-M1 Cellular, RANGER | xlsx | EN | | ranger-tag-guide-archive | din-ranger lte-m1-cellular ranger | en |
| RANGER Tag Guide v0.1.37-HART | RANGER Tag Guide – Archive | LTE-M1 Cellular, RANGER | xlsx | EN | | ranger-tag-guide-archive | lte-m1-cellular ranger | en |
| RANGER Tag Guide v0.1.37-Modbus | RANGER Tag Guide – Archive | LTE-M1 Cellular, RANGER | xlsx | EN | | ranger-tag-guide-archive | lte-m1-cellular ranger | en |
| RANGER Tag Guide v0.1.37-SDI-12 | RANGER Tag Guide – Archive | LTE-M1 Cellular, RANGER | xlsx | EN | | ranger-tag-guide-archive | lte-m1-cellular ranger | en |
| RANGER Tag Guide v0.1.38 | RANGER Tag Guide – Current | LTE-M1 Cellular, RANGER | xlsx | EN | | ranger-tag-guide-current | lte-m1-cellular ranger | en |
| RANGER Tag Guide v0.1.38-HART | RANGER Tag Guide – Current | HART, LTE-M1 Cellular, RANGER | xlsx | EN | | ranger-tag-guide-current | hart lte-m1-cellular ranger | en |
| RANGER Tag Guide v0.1.38-Modbus | RANGER Tag Guide – Current | LTE-M1 Cellular, Modbus, RANGER | xlsx | EN | | ranger-tag-guide-current | lte-m1-cellular modbus ranger | en |
| RANGER Tag Guide v0.1.38-SDI-12 | RANGER Tag Guide – Current | LTE-M1 Cellular, RANGER, SDI-12 | xlsx | EN | | ranger-tag-guide-current | lte-m1-cellular ranger sdi-12 | en |
| RANGER Tag Guide-v0.1.31 | RANGER Tag Guide – Archive | LTE-M1 Cellular, RANGER | xlsx | | | ranger-tag-guide-archive | lte-m1-cellular ranger | |
| Remote HART Configuration using the SignalFire Cloud | Manual | LTE-M1 Cellular, RANGER | pdf | | | manual | lte-m1-cellular ranger | |
| Remote RANGER LTE Directional Antenna Dimensional Drawing | Accessories, Drawing | RANGER | pdf | | | accessories drawing | ranger | |
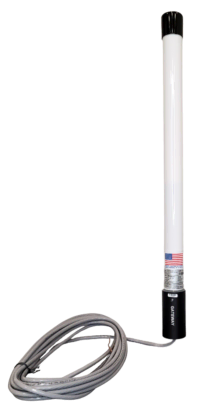
| Remote RANGER LTE Omni Antenna Dimensional Drawing | Accessories, Drawing | RANGER | pdf | | | accessories drawing | ranger | |
| Sentinel/RANGER Remote Mount Bracket Dimensional Drawing | Accessories, Drawing | RANGER, Sentinel | pdf | | | accessories drawing | ranger sentinel | |
